Handbuch:Erweiterung/FlexiSkin: Unterschied zwischen den Versionen
| [freigegebene Version] | [freigegebene Version] |
Mit FlexiSkin können Sie das Erscheinungsbild Ihres Wikis anpassen. Sie können das Design Ihres Wikis über eine spezielle Seite und mit einer Vorschaufunktion ändern. Fügen Sie einfach Ihr eigenes Logo und Favicon ein. Definieren Sie dann die Farben und Schriftarteinstellungen, mit denen Sie ein individuelles Erscheinungsbild erzielen möchten.
Wichtig! FlexiSkin ist nur in BlueSpice pro Cloud enthalten.
Inhaltsverzeichnis
Where to find FlexiSkin?[Bearbeiten | Quelltext bearbeiten]
The FlexiSkin settings can be adjusted on the page Special:FlexiSkin (- watch the spelling as the wiki is case-sensitive).
Logo und Favicon[Bearbeiten | Quelltext bearbeiten]
Logo[Bearbeiten | Quelltext bearbeiten]
Laden Sie zuerst ihr Logo ins Wiki hoch.
Hinweis: Die maximale Größe für das Logo ist 300 x 64 pixels. Wenn Sie ein größeres Bild hochladen, wird es abgeschnitten.
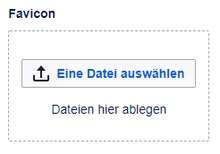
So laden Sie ihr Wiki hoch:
-
Klicken Sie Eine Datei auswählen um ein Logo über Ihren Datei-Explorer zu suchen oder ziehen Sie die Datei in den umrandeten Hochladebereich.
-
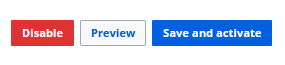
Klicken Sie Preview.
-
Überprüfen Sie die Vorschau des Logos.
-
Um ein anderes Logo hochzuladen, klicken Sie das x-Symbol im Hochladebereich und wiederholen Sie die vorhergehenden Schritte.
-
Speichern und aktivieren Sie das Logo oder nehmen Sie weitere Anpassungen vor.
- Klicken Sie OK. Die Änderungen werden für alle Benutzer unmittelbar gültig.
Tipps zum Umgang mit dem Logo[Bearbeiten | Quelltext bearbeiten]
- Alignment: The logo is placed at the left side of the top bar without any padding or margin applied. The easiest way to make your logo fit: Put it on a 300 x 64 pixel canvas in an image editor and position the actual logo with the desired padding within that area. Then upload your logo.
- Adjusting placement and size: If you have a standard logo that you don't want to reposition on a canvas before uploading, simply upload your logo and add the following to the Free CSS area in FlexiSkin and save the page.
                    @media (min-width: 1001px) {
header nav.navbar {
    padding-left:0; /*add a padding to the left of your logo, e.g. change from 0 10px*/
 }
.bs-logo {
        width:300px; /*sets available logospace to the entire width of the main navigation*/
 }
.bs-logo a {
    background-size: auto 100%; /* width is set to automatically resize based on height. Set height to up to 90% */
 }
}
You can adjust the background size and left-padding as needed.
Hinweis: You first have to save the page to view the logo changes made in Free Css. The preview does not reflect these changes.
Favicon[Bearbeiten | Quelltext bearbeiten]
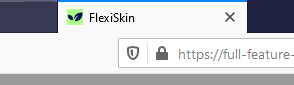
You can also upload your own favicon. The favicon is the image that is shown in the browser tabs. Follow the steps for uploading a logo, just use the favicon upload area instead.
-
- After saving the page, you will see your custom image in the browser tabs of your wiki pages.
-
Sie können auch Ihr eigenes Favicon hochladen. Das Favicon ist das Bild, das auf den Registerkarten des Browsers angezeigt wird. Befolgen Sie die Schritte zum Hochladen eines Logos. Verwenden Sie stattdessen einfach den Favicon-Upload-Bereich.
-
- Nach dem Speichern der Seite sehen Sie Ihr Favicon in den Browser-Registerkarten Ihrer Wiki-Seiten.
Theming[Bearbeiten | Quelltext bearbeiten]
Color presets[Bearbeiten | Quelltext bearbeiten]
The fastest way to customize your wiki colors is to pick a color preset from the available themes. You can fine-tune each theme as needed if one or another color requires tweaking.
The available standard themes are shown here. Wählen Sie ein Thema aus, um Ihr Wiki schnell anzupassen. Sie können jedes Thema nach Bedarf optimieren, indem Soe die eine oder andere Farbe manuell ändern.
Die verfügbaren Standardthemen sind folgende:
-
theme-bluespice.png
bluespice
-
theme-turquoise.png
turquoise
-
theme-orange.png
orange
-
theme-crimson.png
crimson
-
theme-lime.png
lime
-
theme-turquoise-dark.png
turquoise dark
-
theme-sunflower-dark.png
sunflower dark
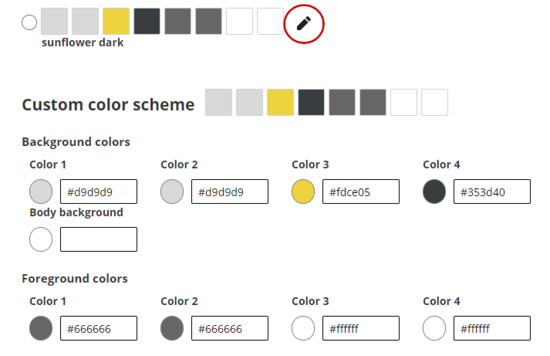
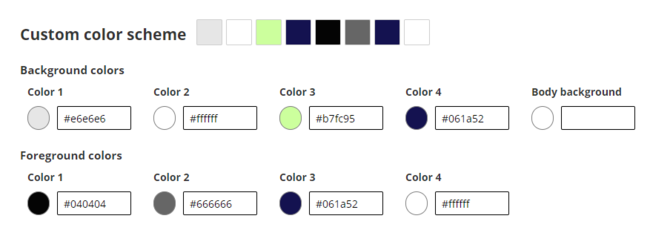
Custom color scheme[Bearbeiten | Quelltext bearbeiten]
Starting with a custom color scheme, you can further adjust individual skin colors to match your own color scheme.
To get started, click on the edit icon next to a color scheme. In my example, I want to have text and a neutral background in my navigation, so I pick "sunflower dark" and then edit it. But first, let's look at the color assignments.
Klicken Sie zunächst auf das Bearbeitungssymbol neben einem Farbschema. In meinem Beispiel möchte ich Text und einen neutralen Hintergrund in meiner Navigation haben, also wähle ich "Sonnenblume dunkel" und bearbeite ihn dann. Aber zuerst schauen wir uns die Farbzuweisungen an.
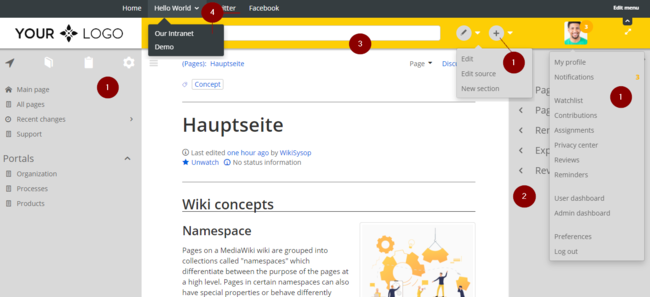
| Background color | Foreground (=text) color | User interface elements Elemente der Benutzeroberfläche |
|---|---|---|
| Color 1 | Color 1 left navigation, edit and create buttons with drop down menus, user | profile menu Linke Navigationsleiste, Schaltflächen "bearbeiten" und "erstellen" mit Dropdown-Menüs im Topmenü , Benutzerprofil-Menü |
| Color 2 | Color 2 page tools / quality management tools | Seitenwerkzeuge, Werkzeuge zum Qualitätsmanagement |
| Color 3 | Color 3 | top bar (since there is no text in the top bar, the foreground color only sets the color of the toggle iconsKopfleiste (da hier kein Text existiert, werden nur die Umschalter eingefärbt) |
| Color 4 | Color 4 custom menuwith drop down menus | Topmenü mit Untermenüs |
| Body background | - | Page background. It is mainly visible when the navigation pane and the tools pane are minimized. |
| Sseitenhintergrund. Dieser ist hauptsächlich in der Fußleiste sichtbar und wenn die Navigations- und Werkzeugleisten eingeklappt sind |
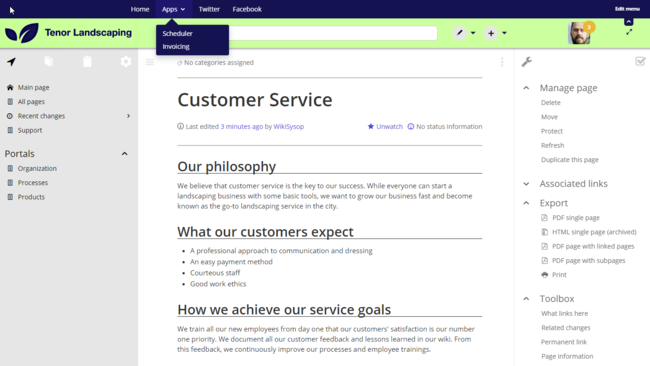
- Als Beispiel ändern wir nun die Hauptfarben des Wiki-Layouts:
-
- Das Resultat sieht so aus:
- scheme
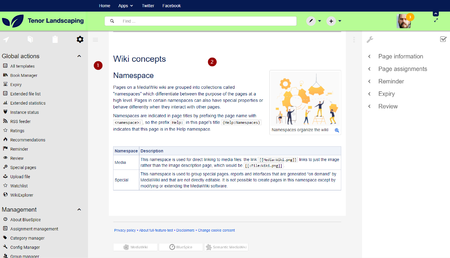
Content[Bearbeiten | Quelltext bearbeiten]
In the content settings, you can adjust styles related to the actual content area (2) of the wiki page:
Unter Content können Sie Stile anpassen, die sich auf den tatsächlichen Inhaltsbereich (2) der Wiki-Seite beziehen:
Hinweis: You first have to save the page to view the changes made to the content settings. The preview does not reflect these changes.
Colors[Bearbeiten | Quelltext bearbeiten]
| Background color | Foreground (=text) color | User interface elements |
|---|---|---|
| Content background | Page background. It is mainly visible when the navigation pane and the tools pane are minimized. | |
| Content background | Content color | Color of the flowtext of the wiki page. |
| Valid link | Link color that indicates that a linked page exists (standard link). | |
| Broken link | Link color that indicates that the linked page doesn't exist ("redlink") . | |
| Header 1-6 | Color for the individual heading levels.
Header 1: Page title Header 2: Heading, ToC heading Header 3: Sub-heading 1 Header 4: Sub-heading 2 Header 5: Sub-heading 3 Header 6: Sub-heading 4 |
|
| Color 4 | custom menuwith drop down menus |
Font[Bearbeiten | Quelltext bearbeiten]
You can also change the font settings for the wiki pages. These settings only apply to the text in the content area. The text in other areas, such as the navigation and the tools panels or the top menus, is not affected.
Layout[Bearbeiten | Quelltext bearbeiten]
You can also change the width of the content area, if you want to. Just make sure to test it on many devices to make sure that it works as intended, since wiki users work with different display settings. Unless you have a specific reason to change the content width, there is no need to make adjustments to this setting.
Headings[Bearbeiten | Quelltext bearbeiten]
For all heading levels, you can adjust color, font size and underlining of the different heading levels. You can also change the unit type for your font-settings (e.g, px instead of rem). If you are not familiar with the differences between the unit types, simply leave the default setting of rem.
Free CSS[Bearbeiten | Quelltext bearbeiten]
For additional adjustments that are not possible with the FlexiSkin settings, you can use the Free CSS field if you are familiar with CSS. We already looked at how you can adjust your logo size and position with CSS.
Here, we look at two more examples: Adjusting the margin around headings and using an external font.
Hinweis: You first have to save the page to view the logo changes made in Free Css. The preview does not reflect these changes.
Example1 : Increase margin of main heading[Bearbeiten | Quelltext bearbeiten]
To add some extra space before the main headings, add this code to the Free CSS field: /* add bigger margin before main heading */
#content h2 {
margin-top: 3rem; /*adjust as needed*/
}
Example 2: Use external font (Google font)[Bearbeiten | Quelltext bearbeiten]
If you prefer to use a different font, you can also add this to Free CSS. Make sure that these lines are added at the beginning of the CSS.
There are two steps necessary. First, you need to import the fonts. Here we use the Google fonts Roboto and Lato. Then you need to define which skin elements should use which font. You can define them separately for the content area and the navigation panel. To achieve this, copy the following code to the top of Free CSS: /*Only import the fonts you want to use*/
@import url(https://fonts.googleapis.com/css?family=Roboto:400,700);
@import url(https://fonts.googleapis.com/css?family=Lato:400,700);
/*Use fonts - they have to be defined with @import at the beginning of this CSS*/
body.mediawiki, body.mediawiki.x-body, #content #bodyContent , #firstHeading, #content #firstHeading
{font-family: 'Roboto',"arial",sans-serif;} /*Content and top menus*/
.panel .list-group a.list-group-item span, .bs-panel .list-group a.list-group-item span, #bs-globalactions a.list-group-item span
{font-family: 'Roboto',"arial",sans-serif;} /*Main navigation*/